 |
||
|
|
||
|
Page Title:
ADDING SEDIMENT TO CELLS/COLUMNS |
||
| |||||||||||||||
|
|
 ERDC TN-DOER-C10
March 2000
cell in ~15-mL increments, being careful not to let column dry out. Recap
bottom end.
B.
ADDING SEDIMENT TO CELLS/COLUMNS.
1) Mix preweighed freeze-dried sediment with diatomaceous earth (1:4 by weight).
The diatomaceous earth adsorbs any water associated with the sample that would
cause inefficient extraction.
2) Transfer the mixture to the conditioned packed cell using a small funnel with short
1/2-in. stem. Record cell serial numbers with weights of sediment. It is
important to track the cells via their serial numbers. Labeling with tape will not
work, since the cells will be exposed to high temperature. Markers are not
desirable because even permanent ink can be lost upon exposure to solvents.
3) Fill the remaining space in the cell with Ottawa Sand, leaving just enough room
for a cellulose filter.
4) Install the cellulose filter and seat snugly with the dowel.
5) Screw on the end cap by hand (do not overtighten).
6) Repeat these procedures for all samples.
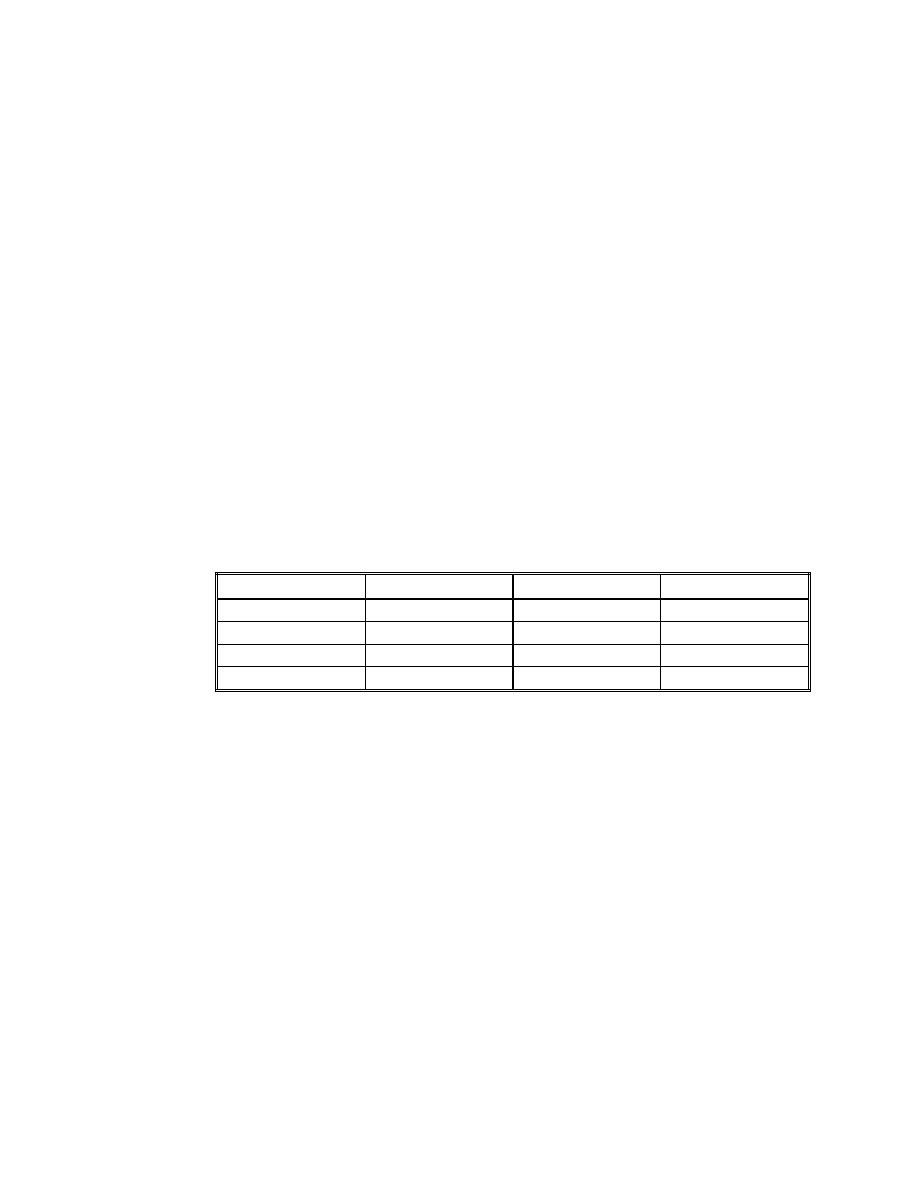
7) Turn on the ASE 200, press the menu button, set up the following parameters, and
save under a method number:
Parameter
Setting
Parameter
Setting
Temperature
100 C
Flush volume
60 mL
Pressure
1,500 psi
Cycles
2
Static Time
5 min
Purge
60 sec
Heat
5 min
Flush percent
60 vol.
8) Select the method/schedule button and the method number under which the
program was saved. Type in the appropriate starting vial/cell number.
9) Place the cells in the tray, with the serial numbers on top (if samples are put in the
tray in the wrong direction, the extract will not pass over the SA/SG and will not
be cleaned).
10) Label the 60-mL collecting vials with the corresponding serial number on the cells
and place the vials in the correct position in the carousel.
11) Press Start. Extraction should take about 30 minutes per sample.
12) After all samples have been extracted, pour the contents of the vials into
numbered, solvent-rinsed, graduated Zymark tubes, rinsing each vial once with
approximately 2-3 mL of DCM.
C.
SOLVENT EXCHANGE.
1) Concentrate the extract in the graduated Zymark tube to 1.5 mL.
2) Add 1.5 to 2.0 mL iso-octane and concentrate the extract again to 0.2 mL.
10
|
|
Privacy Statement - Press Release - Copyright Information. - Contact Us - Support Integrated Publishing |
